
UMIDIGI手机安装第三方 recovery(TWRP,CWM等)和root
- Custom recovery images of different Android versions are not always interchangeable. For example, you can't install an Android 5.0 recovery on a 4.4 system and so on. Any exceptions are mentioned in the list of recovery images.
- At most of the devices, after flashing the TWRP image, first you have to boot into recovery (TWRP) or the stock recovery will be restored.
- At some devices, after flashing TWRP, first you have to root your phone (install SuperSU or Magisk) or it won't be able to boot into the system.
- Once you've rooted your device, you won't be able to install OTA updates anymore but the only way to update your phone is flashing with SP Flash Tool. Flashing a stock ROM (with the stock recovery) will make you able to install OTA updates again.
- At some devices (or specific ROM versions), when powering on your phone to boot into TWRP (power + vol-up), after about 3 seconds, you have to release the power button (even if your screen is still black) and keep only the vol-up button pressed until the TWRP welcome screen pops up or the recovery will be skipped and your phone will boot into the system.
Driver for Preloader USB VCOM mode: Windows 10 already can automatically install it or you can use this: MTK_Driver_Auto_Installer_SP_Drivers_20160804.exe
SP Flash Tool application:
SP_Flash_Tool_v5.1812.rar
- UMi Zero: UMI_ZERO_TWRP_2.8.2_recovery.img
- UMi eMAX: TWRP_2.8.1.0_UMI_EMAX_4.4.4_284X_v2_recovery.img for Android 4.4 or UMI_eMAX_TWRP2.8.7.0_lollipop.img for Android 5.x.
- UMi Hammer: UMI_Hammer_TWRP_2.8.7_recovery.img
- UMi Hammer S: HammerS_TWRP_2.8.7.3.img (not tested on real device)
- UMi Fair: CWM_Umi_Fair.img (created by #megthebest)
- UMi Iron: UMI_Iron_TWRP_2.8.7_recovery.img
- UMi Iron Pro: UMI_Iron_Pro_TWRP-2.8.70_recovery.img (created by #megthebest)
- UMi Rome: Rome_TWRP_3.0.0.img (created by #megthebest)
- UMi Rome X: TWRP3.0.0RomeX.img (created by #megthebest) or TWRP3.0.2-UMI_ROME_X.img (created by #ZonaRMR)
- UMi Touch: Touch_TWRP_3.0.2.img or CWM_6.0.5.1_UMI_touch.img
- UMi Touch X: TWRP_302_for_UMI_Touch_X_201605171.img (created by #jemmini)
- UMi Super: TWRP_3.02_UMI_Super.img and TWRP-3.1.1-0-SUPER.img only for Android 7.0
- UMi London: TWRP_302_UMI_London.V3.01_20160612.img (created by #jemmini)
- UMi MAX: TWRP_302_UMI_MAX.V1.01_20160819.img (created by #jemmini) also compatible with Android 7.0
- UMi Plus: TWRP_302_UMI_PLUS.V3.01_20161019.img (created by #jemmini) also compatible with Android 7.0
- UMi Diamond: TWRP_302_UMI_Diamond_V5.0_20161103.img (created by #jemmini)
- UMi Plus E: PlusE_TWRP_303_V3.01_20170112.img (created by #jemmini)
- UMi Z and Z Pro: TWRP_303_UMI_Z.V3.01_20170116.img (created by #jemmini) also compatible with Android 7.1.1
- UMIDIGI C Note: C_Note_TWRP-3.1.1-0.img (created by #joe2k01)
- UMIDIGI G: recovery_len6737m_35_n-110418.img
- UMIDIGI C Note 2: cnote2_trwrp_recovery.img (tap the right button to change language)
- UMIDIGI Crystal MT6750t: Crystal_mt6750t_twrp_3.1.1_recovery.img (tap the right button to change language) - You have to format the data partition to be able to access it
- UMIDIGI S2: UMIDIGI_S2_CWM_notouch_recovery.img (upside-down screen, no touch, can be controlled with the side buttons)
- UMIDIGI S2 Lite: TWRP_3.2.1_S2Lite.img (tap the right button to change language) - You have to format the data partition to be able to access it
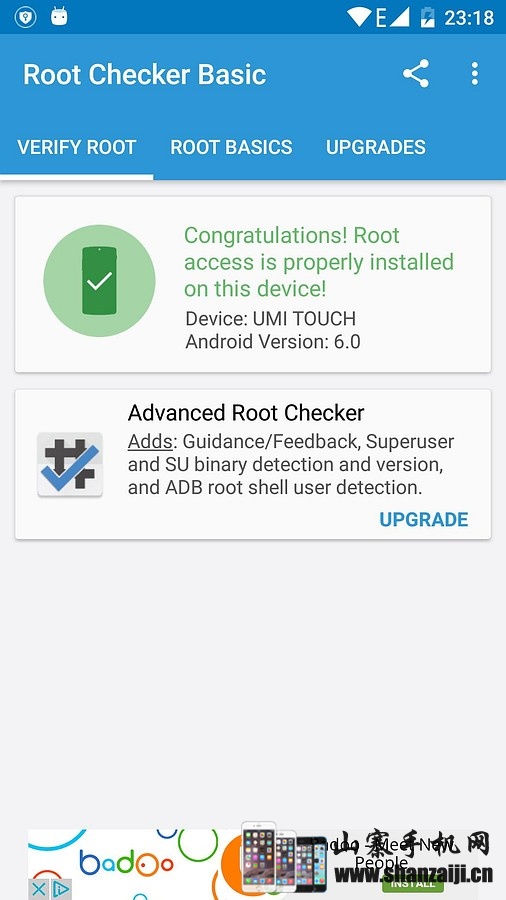
Devices can get root access only with Magisk Manager
- UMIDIGI A1 Pro: TWRP-3.2.1-a1_pro-20180612.img You have to format the data partition to be able to access it
- UMIDIGI Z2: TWRP_3.2.3_Z2-140918.img You have to format the data partition to be able to access it
- UMIDIGI One/One Pro: TWRP_3.2.3_One_Pro-180918.img You have to format the data partition to be able to access it
- UMIDIGI Z2 Pro: TWRP_3.2.3_Z2_Pro.img You have to format the data partition to be able to access it
Charge the battery of your phone to at least 50% and turn it off before starting this process.
1. Install the MTK_Driver_Auto_Installer_SP_Drivers_20160804.exe driver (if your system cannot download and install the drivers automatically).
2. Extract the SP_Flash_Tool_v5.1812.rar file and run flash_tool.exe.
3. Extract the content of the ROM archive, that you downloaded for your specific phone in the ROM section.*
*Beside the recovery image file, just only a compatible scatter file is mostly enough for this process but not always without editing it. So please strictly follow the instructions below and use a full ROM package together with the scatter file inside its folder. Don't use a such setup where not all partitions are loaded.
4. Open the scatter file, that you can find in the ROM folder.
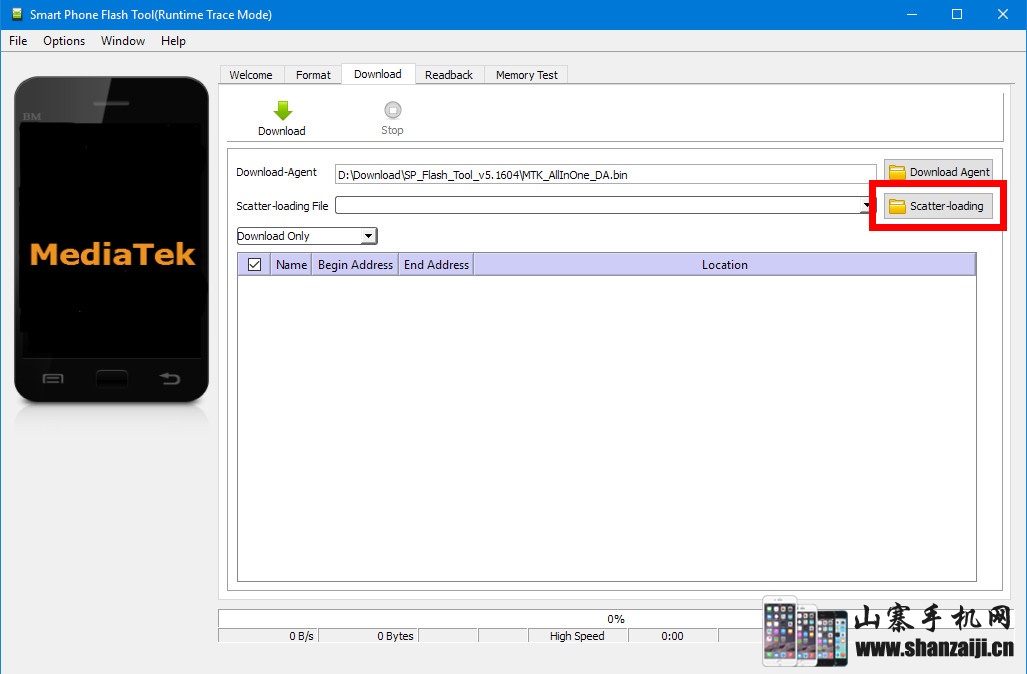
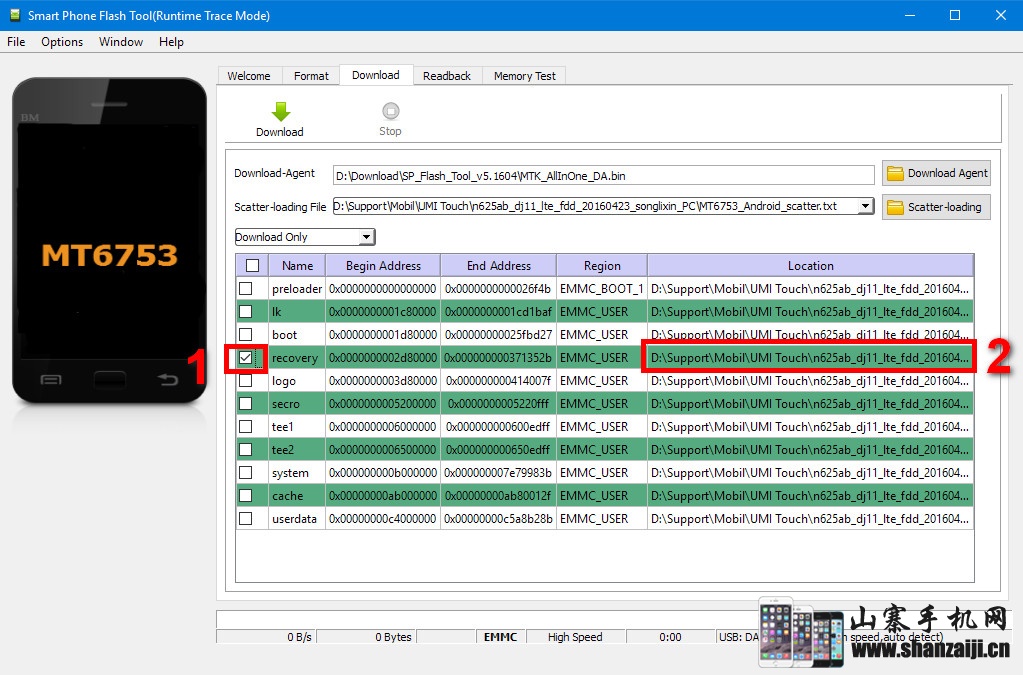
5. Leave only the recovery line checked, then double click on its Location field and brows for your device specific custom recovery image file, that you can find in the list above.
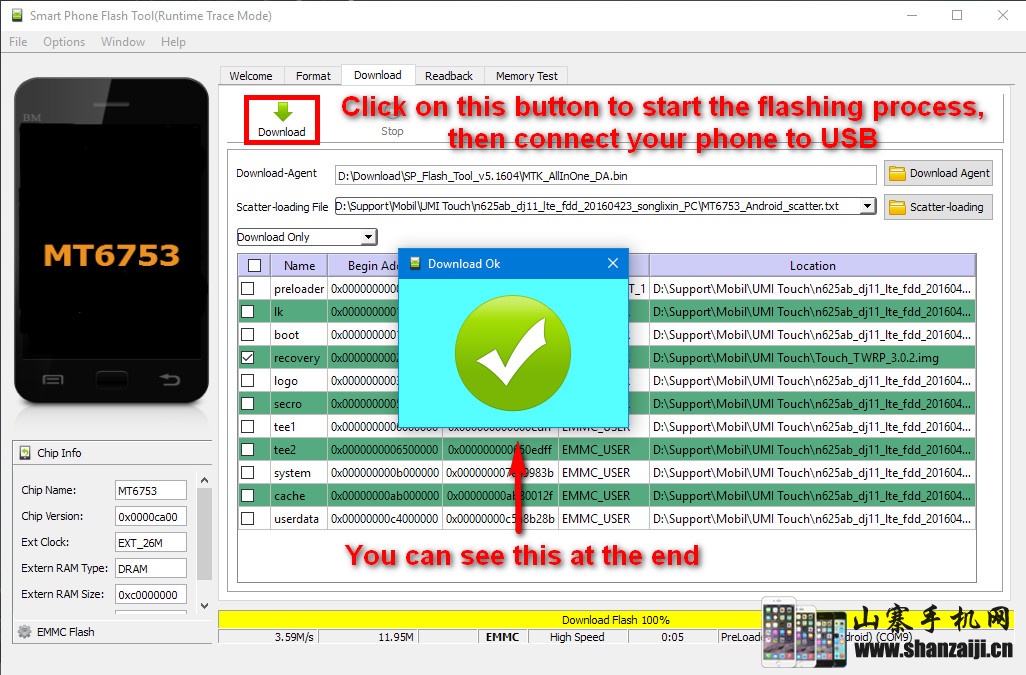
6. Click on the Download button and connect your phone to a USB port of your computer. The flashing process will start automatically and it needs just a few seconds.*
*At some models you have to press one of the volume buttons while connecting to USB but most of them don't need it and you mustn't press any of the buttons.
7. Now the custom recovery has been flashed. You may remove the USB cable. You can boot your phone into recovery by powering it on while pressing the volume up button. After your phone is powered on, release the power key but still keep the vol-up button pressed until the TWRP boot screen pops up.
*At some models this action starts the bootloader mode and you can boot into recovery from its menu. In such menus you can navigate with the vol-up button and select an item with the vol-down button.
*At some models you HAVE TO boot your phone into recovery at the first power on that follows the TWRP flashing or the original stock recovery will be restored by the system. So that's always better to start with booting into recovery after the flashing process finished.
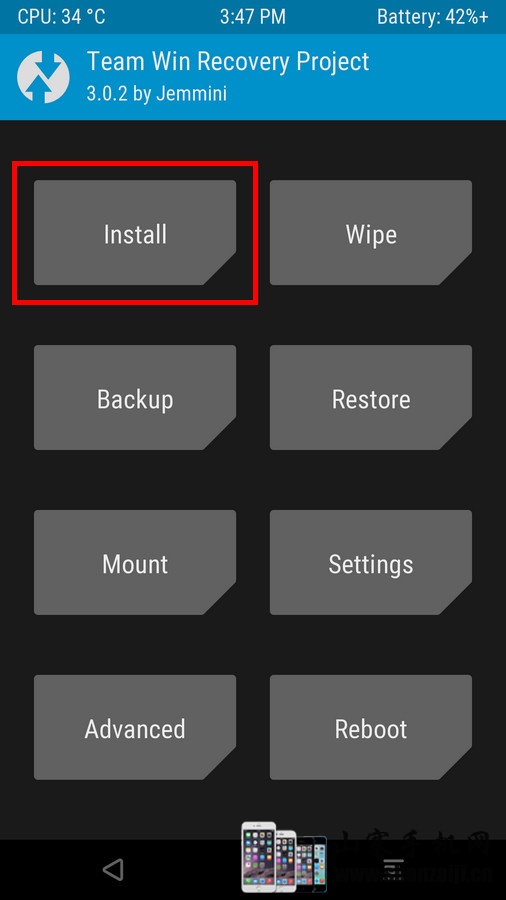
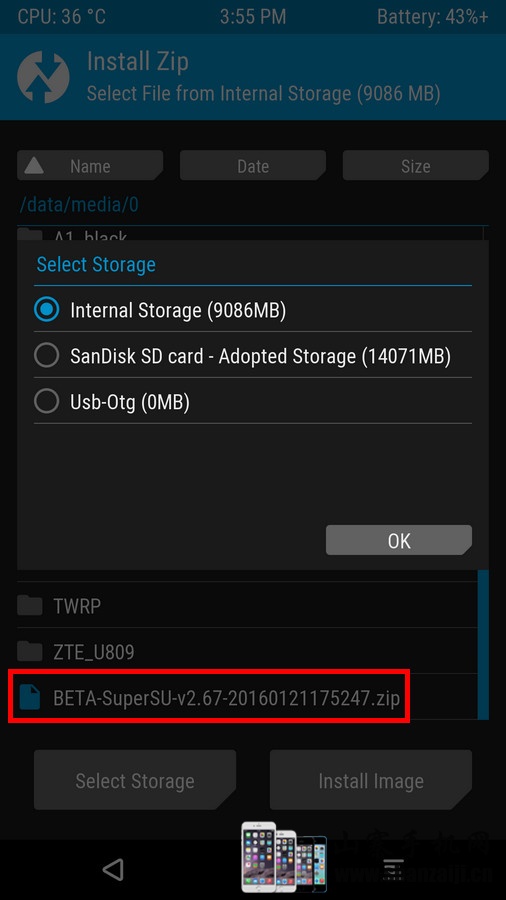
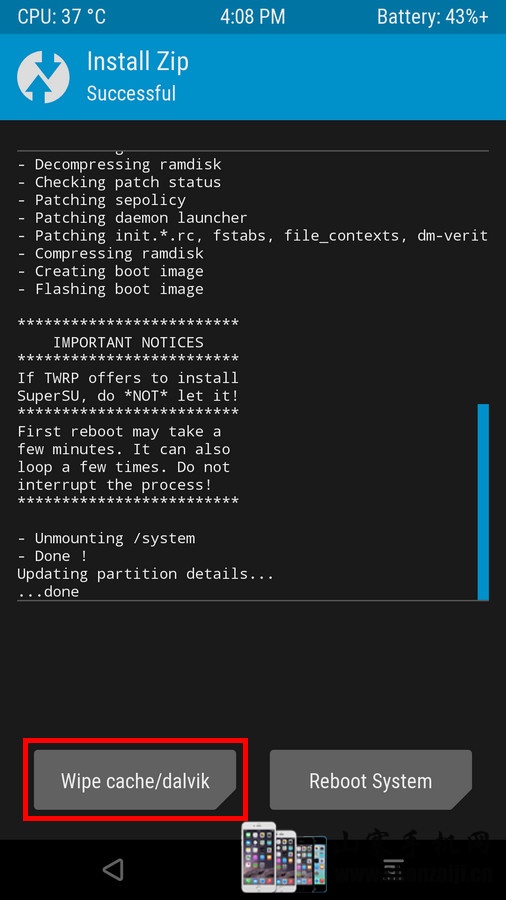
- On the next screen don't check any of the options, just swipe right the bottom slider to start the installation process.
- Wait until the installation finishes. It needs just a few seconds, not a long time.